A Cheetah begins life as a pile of
aluminum sheets. These eventually become the monocoque section of the
chassis.
 The sheets are sheared to size, then loaded into a very
large Amada 344 NC turret punch press (shown in the photo on the left). Each sheet is loaded one at a time
onto the press' X-Y coordinate actuator. After the operator engages the
machine, computer control takes over and automates the punching of all
holes and the cutting of all edges, producing precise and repeatable
parts.
The sheets are sheared to size, then loaded into a very
large Amada 344 NC turret punch press (shown in the photo on the left). Each sheet is loaded one at a time
onto the press' X-Y coordinate actuator. After the operator engages the
machine, computer control takes over and automates the punching of all
holes and the cutting of all edges, producing precise and repeatable
parts.
The various shapes for the monocoque sections that come out of the punch press then get readied for bending. Excess material outside the desired pattern is removed, and the edges of each piece are filed and de-burred.
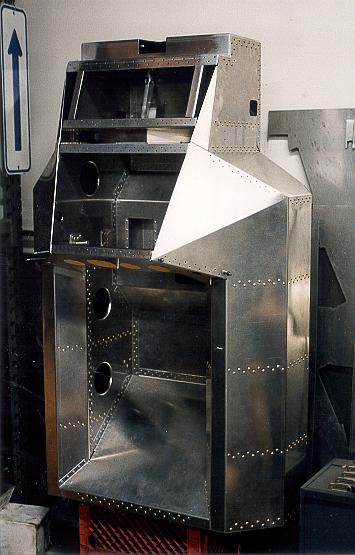
 Some pieces have holes which are formed to add strength to the sheets. The
holes also allow access to the inside of the monocoque compartments during
and after assembly. Some of these holes are also later used to route
electrical wires, control cables, and the fire system plumbing. This photo
shows a side structure from the inside looking out (without the inner
panel installed). The formed holes are visible in the lateral supports.
Some pieces have holes which are formed to add strength to the sheets. The
holes also allow access to the inside of the monocoque compartments during
and after assembly. Some of these holes are also later used to route
electrical wires, control cables, and the fire system plumbing. This photo
shows a side structure from the inside looking out (without the inner
panel installed). The formed holes are visible in the lateral supports.
 Some pieces are then bent at one of several Diacro
or Amada NC press brakes (shown in the photo on the left). These brakes allow
repeatable precise bends to be made at the proper location and with the correct
bend angle.
Some pieces are then bent at one of several Diacro
or Amada NC press brakes (shown in the photo on the left). These brakes allow
repeatable precise bends to be made at the proper location and with the correct
bend angle.
Other pieces are welded together to achieve their desired shape.
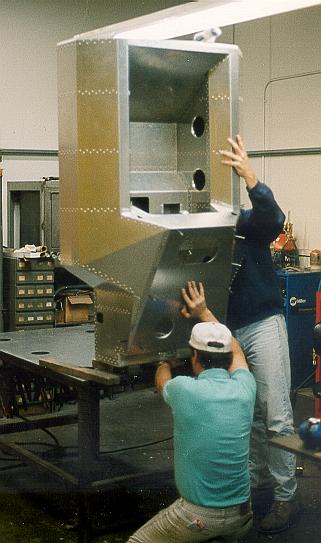
 Once the various pieces are cut, bent, formed, and welded, they are ready for
assembly. The pieces are put together and temporarily held with Cleco
fasteners to ensure that there is a good "dry fit". The pieces
are then ready to be permanently riveted.
Once the various pieces are cut, bent, formed, and welded, they are ready for
assembly. The pieces are put together and temporarily held with Cleco
fasteners to ensure that there is a good "dry fit". The pieces
are then ready to be permanently riveted.
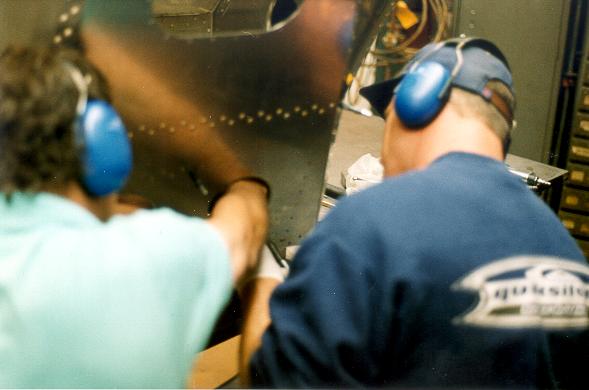 The Cheetah monocoque design specifies the use of aircraft
grade rivets which are installed via a "bucking" process,
The Cheetah monocoque design specifies the use of aircraft
grade rivets which are installed via a "bucking" process,
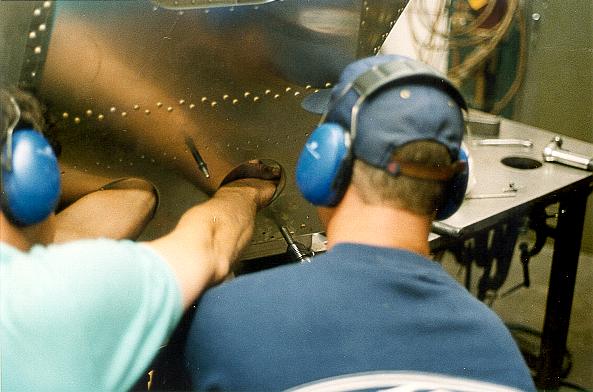
 also used in aircraft assembly. For a rivet to be installed, the two pieces of
material to be joined must sit flush on top of on another. Each rivet should
slide through its hole in the material with a tight fit. (Often, holes are punched
also used in aircraft assembly. For a rivet to be installed, the two pieces of
material to be joined must sit flush on top of on another. Each rivet should
slide through its hole in the material with a tight fit. (Often, holes are punched
 smaller than desired so that the eventual mating holes can be reamed in place
for an exact fit.) The back side of the rivet has a mandrel held against it,
while the rivet head is hammered by an air rivet gun. Hammering
of the rivet against the mandrel causes the body
of the rivet to expand in diameter, in the already tight hole, and also
flattens the back side.
smaller than desired so that the eventual mating holes can be reamed in place
for an exact fit.) The back side of the rivet has a mandrel held against it,
while the rivet head is hammered by an air rivet gun. Hammering
of the rivet against the mandrel causes the body
of the rivet to expand in diameter, in the already tight hole, and also
flattens the back side.
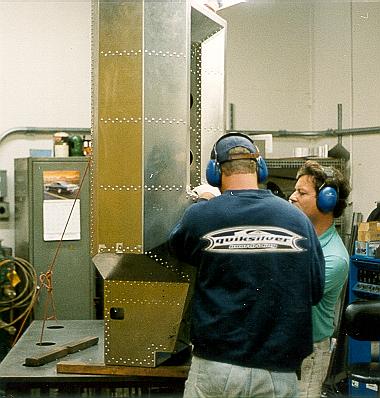
 Bucking rivets is a labor intensive operation requiring two highly skilled
personnel to achieve quality results. On only a few areas of the
monocoque, where the back side of the rivets are inaccessible to a
mandrel, are structural grade "pop" rivets used.
Bucking rivets is a labor intensive operation requiring two highly skilled
personnel to achieve quality results. On only a few areas of the
monocoque, where the back side of the rivets are inaccessible to a
mandrel, are structural grade "pop" rivets used.
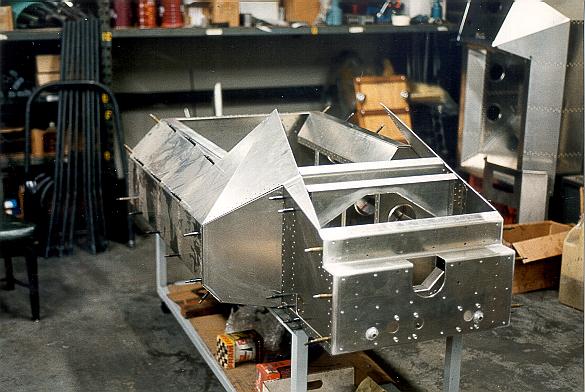
 This shot shows the left front internal structure before the inner side panel
has been assembled and riveted in place. The left side of the image is the
area directly behind the left wheel, where the water pipes to the radiator
will later run. The right side shows the foot box with the hole for the
clutch master cylinder visible.
This shot shows the left front internal structure before the inner side panel
has been assembled and riveted in place. The left side of the image is the
area directly behind the left wheel, where the water pipes to the radiator
will later run. The right side shows the foot box with the hole for the
clutch master cylinder visible.
 The front roll hoop resides inside of the monocoque, and the down tubes
connecting the rear hoop to the front hoop pass through the dash.
Therefore, the front top panel and the dash are not install until the roll
cage has been fitted. The dash panel in these photos was only in position
here to facilitate visualization of the layout for gauges and switches,
which is specified by the customer and unique to each car.
The front roll hoop resides inside of the monocoque, and the down tubes
connecting the rear hoop to the front hoop pass through the dash.
Therefore, the front top panel and the dash are not install until the roll
cage has been fitted. The dash panel in these photos was only in position
here to facilitate visualization of the layout for gauges and switches,
which is specified by the customer and unique to each car.
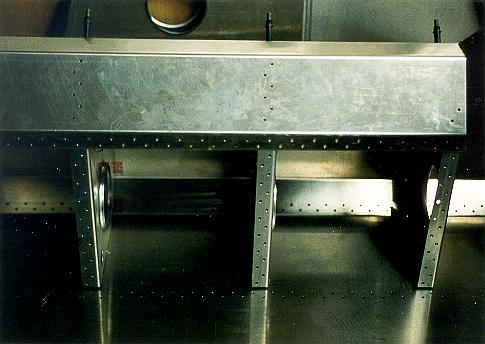
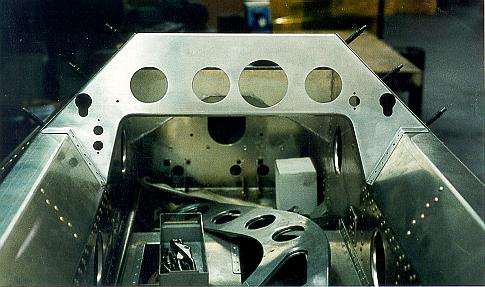
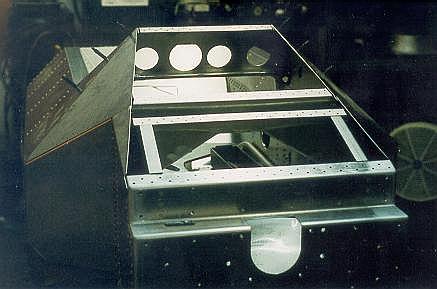 This image shows some of the intricate internal support structure of the
monocoque. The U shaped hole at the bottom is where the steering column
will pass through the front. Again the dash is only Clecoed in
place at this point. The dash roll bar is not in place at this time.
This image shows some of the intricate internal support structure of the
monocoque. The U shaped hole at the bottom is where the steering column
will pass through the front. Again the dash is only Clecoed in
place at this point. The dash roll bar is not in place at this time.
The Roll Cage & Rear Space-frame (eventual link)